Showing posts with label Yellow. Show all posts

Sunday, April 14, 2013

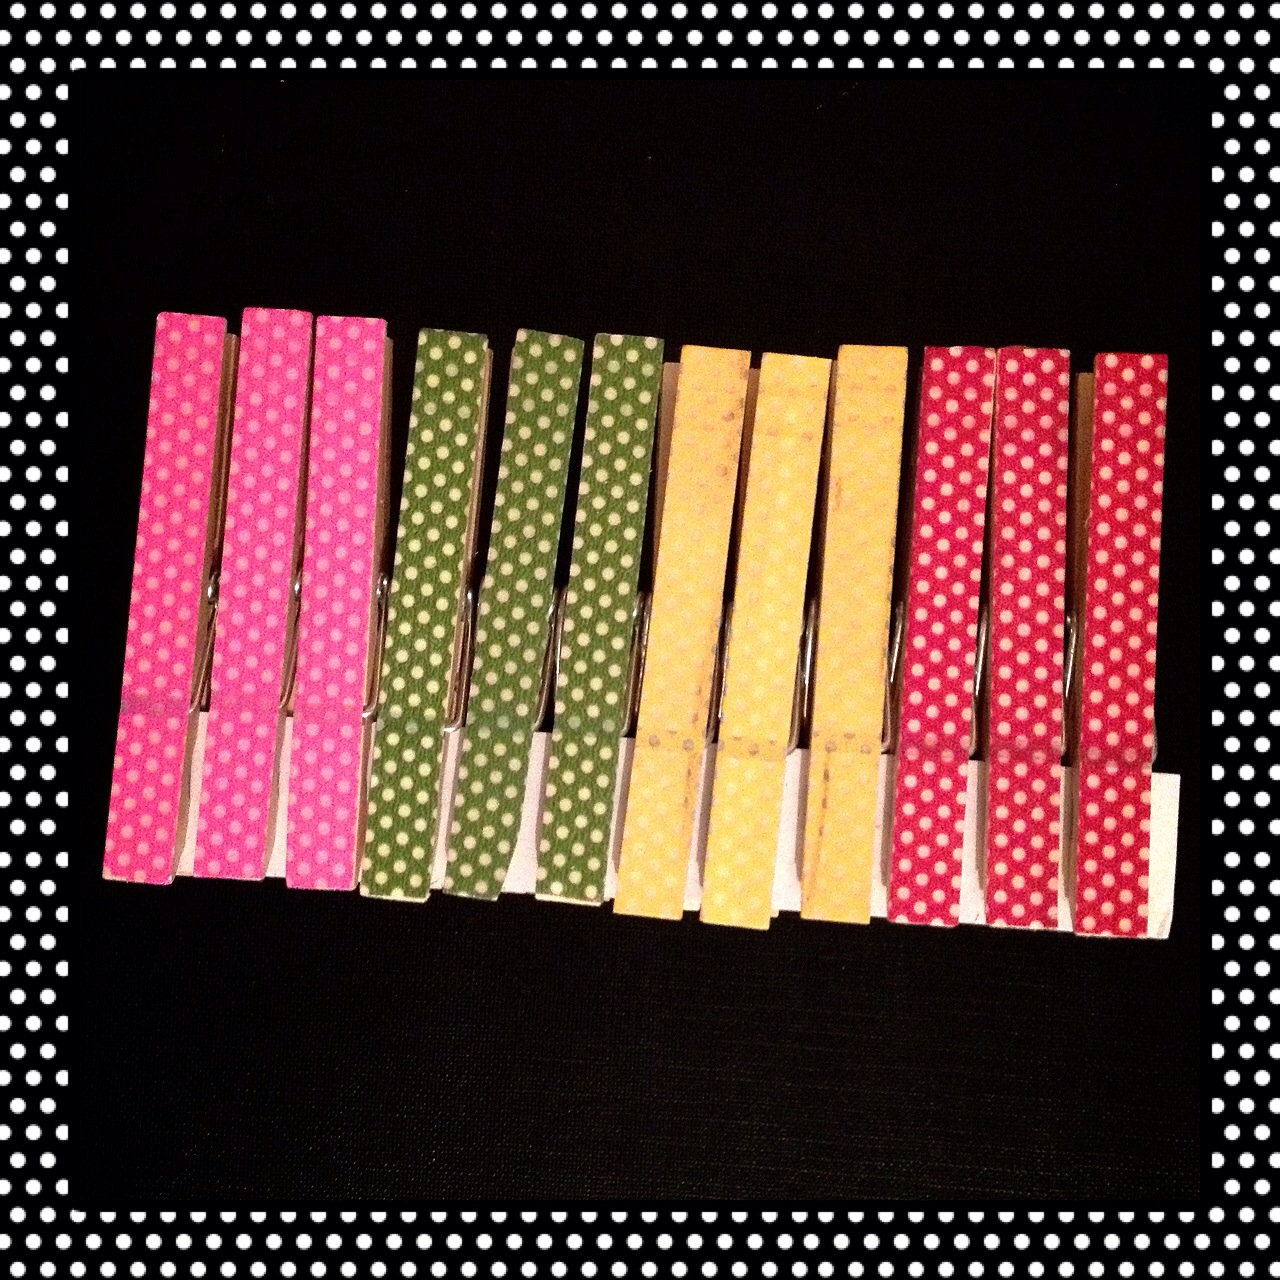
Make My Day ~Spotty, Dotty Pegs~

Untitled
Yes! Here I am again offering something to you. Hopefully everyone I sent a postcard to has received it by now.
 
Anyway I was itching to make some simple but lovely pegs and I have a thing about polka dots at the moment. I've only made one of these sets but if this turns out to be popular I will make another set and pick 2 people to receive them. They are great for using indoor to attach notes, letters, photos etc... to them.
 
So if you would like these
why not shout
Make My Day
in the comment section!
 
Please remember to leave a way for me to get in touch with you!

This is on its way to
Selene

Friday, February 17, 2012

~Make My Day Birthday Bash 1~Garden of Eden Hoops~

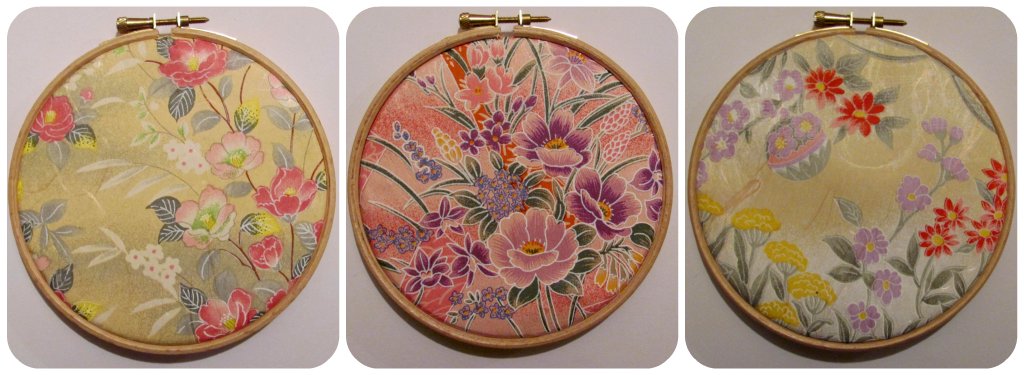
When creating my greeting cards yesterday I came across these beautiful sheets of origami paper which I've had for a long time....
Hoops
Hoops
I liked them so much I didn't want to use them as it seems a shame to cover up the beautiful design but also the sheets are a lovely textured type. It suddenly came to my mind to use hoops to frame the sheets and to do nothing else with them. I've seen this done with really pretty fabric and it looks so nice hung on the wall. I hope that you agree that its the best way to use these.

If you would like these 5 hoops
Please shout
Make My Day
In the Comment section!

Remember that you can post my blog button somewhere on your blog and also to let your friends know of all the great things you can receive on my blog. Only one more day left for celebrating,
Doesn't time fly by?

You can also suggest themes and craft/stationery supplies that you'd like me to offer you the chance to get.

This is on its way to

Thursday, February 16, 2012

~Make My Day Birthday Bash 1~ I Love To Be Within Nature~

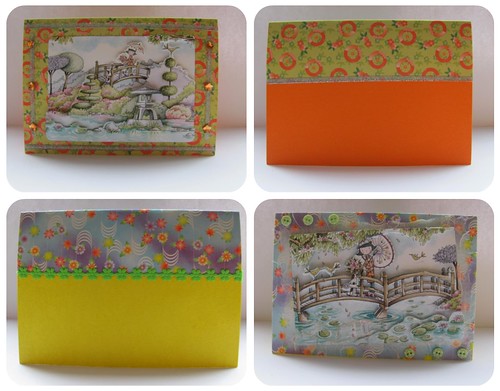
On Monday I went to a store near my house with a craft section and came across the Tulip Essential Range which I absolutely loved... I almost bought the mini version of these premade but they were small and not worth the price but I really liked them so in the end I decided to buy this set as my Forever Friends one was the same thing and it was definately worth the money.

It was a pain messing around with all the foam but I love how they turned out and almost gave them away without doing anything to them but I had to and this is what I came up with....
tulip
Tulip Cards
I've used origami paper as these images have such an oriental feel to them, ribbon, mulberry paper, gems and buttons. I had to keep it simple as they images are quite big and if I did more to it they would have been lost.
If you would like these
why don't shout
Make My Day
in the comment section!

Good Luck!

This is on its way to

Saturday, February 4, 2012

Make My Day... Turn Back The Hands Of Time or....

...use the key to unlock the door to the furture ATC...

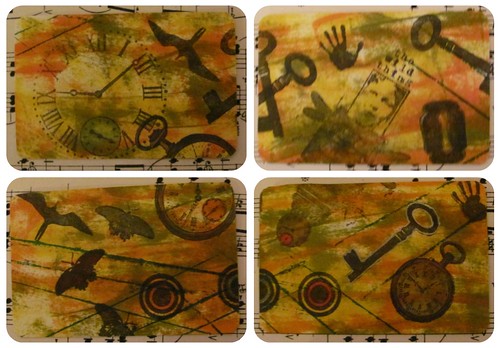
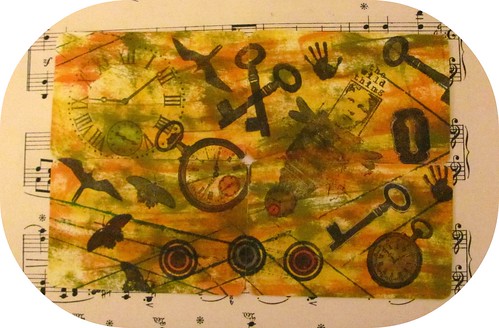
I had something part made last week and tried to complete it today but my heart wasn't in it so I gave up and decided to do this ATC project that I'd seen years ago and wanted to make but no one ever created a swap on it in the yahoo groups I was in. So today was my day to create this 4 piece ATC to create one big image. I love how it turned out but I'm going to one day make another where each ATC is something on its own too. This was my first time doing it so I just wanted to experiment freely plus I have an awful cold where I can't concentrate so it wouldn't have been much fun.
Time
I used yellow, orange and green distress ink
and
which I stamped in black.
I did one sheet in brown but it was just too dark for my liking
and liked the softness of this one.
I coloured some of the stamped images in with pro markers
and went around 2 images in gold and silver gel pens.
time to 001
By the way the colour of these are a little more brighter then what it looks like in my photos.

Oh! I almost forgot to tell you to write
 make my day in your diary
starting from next weekend for a whole week
to celebrate the 1st birthday of my blog
I'll be having a giveaway everyday!

I'll have holidays at that time
which is why I haven't organised it sooner
as I should hopefully get my mind organised
in getting things prepared
but also I'm hoping for a couple of snow days off to craft!
Wishful thinking I know
 but who knows as we have a visit from Mr Snow today
and he maybe around for a while.

I will be giving away handmade items, craft and stationery supplies
so keep your eyes wide open.

For now though lets focus on these ATCs
If you would like them
Why not shout
Make My Day
in the comments section.

Good Luck!

This is on its way to
Olivia

Saturday, October 1, 2011

Make My Day....I think its called Love...

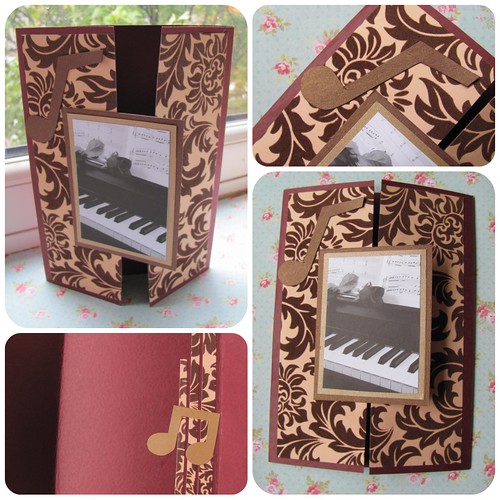
when you hear music, receive roses and can see stars.... or is that only in fairy tales! Hmm... where ever it maybe today its here for you to receive! Music and Roses
I bought some more craft paper last week and began working on this card straight away. Its a style I haven't tried before so it turned out to be quite a pain and took longer then expected but I hope you like the outcome :).

I decided to keep it simple in order not to lose the effect of that gorgeous velvety patterned paper that you can see.

What bits of paper I had left I used it on the inside of the card and created the 2 musical notes myself. I will when I get the chance make an envelope for this. 
flowery stars...
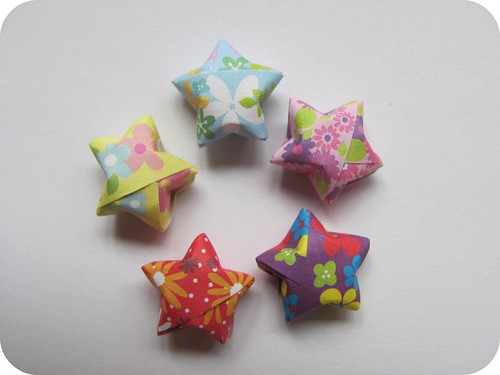
I also bought some great packs of Lucky Stars papers so I couldn't help creating 50 stars for you to receive too. Lucky stars are meant to have a meaning behind them in the sense of love but in my case I just like making them.

So if you like these items
Why not shout...
'Make My Day'
in the comment section.
Good Luck!

This is on its way to
Pamela

Wednesday, September 14, 2011

Make My Day...Delicious Delights of Vera De Muis...

On Tuesday I got up early to open the door to my sister for my niece, I was actually late coming down and it was funny to open the door to find my niece sitting on the door step like a parcel. She was quite happily chattering away to the cat whilst her mum went to the car to get her phone to ask one of us to open the door. As I had  about an hour before I actually went to work I decided to sit down and craft. It simple was the best thing to do as I felt so relaxed that day....
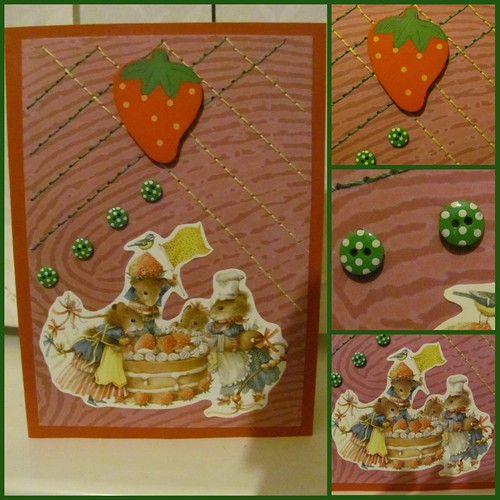
Strawberry Vera De Muis
I picked up the strawberry which someone I used to write to sent to me a long time ago. I really wanted to create something with it but I didn't know what so I just gathered the background paper and started stitching away. There was an envelope on my desk which I've wondered for some time what it was but never got around to opening it but I did for some reason that morning and was so happy to see my Vera De Muis images which a different friend sent me and I've had fun for years creating with. Well the strawberry cake fitted in so well and everything fell into place.
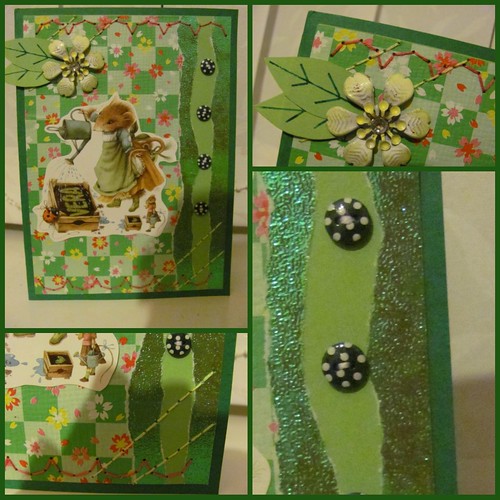
Garden Vera De Muis
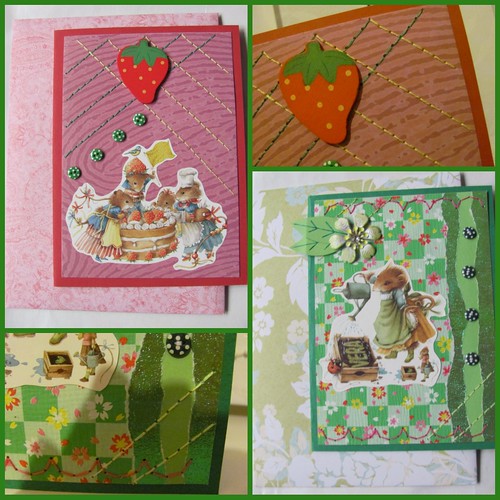
As you know I can never stop by making one card so I made another which is Vera's garden wonderland... I used exactly the same type of things but in a different style.... background paper, buttons, stitching using my Fibre Art equipment and the strawberry/flower but most of all of course a picture of Vera.

If you like these 2 wonderful cards which will have handmade envelopes due to my insane mind making these bigger then A6...
Vera De Muis Envelopes
Shout
'Make My Day '
in the comments section
Good Luck!

These greeting cards have gone to
Bethany


Tuesday, August 30, 2011

Make My Day....Notice me....

I always say it but I really don't know where the days and time has gone, I've sat many times to sit and craft something but now have a million and one different projects on the go that I need to complete so that I can offer them to you to take....
Tatty Teddy 004
Tatty Teddy 003Tatty Teddy 002
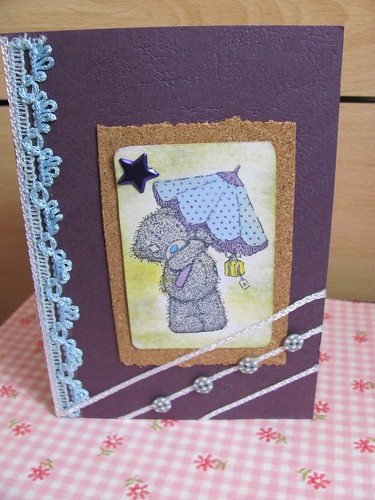
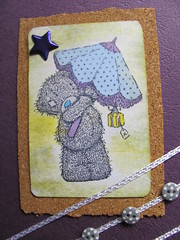
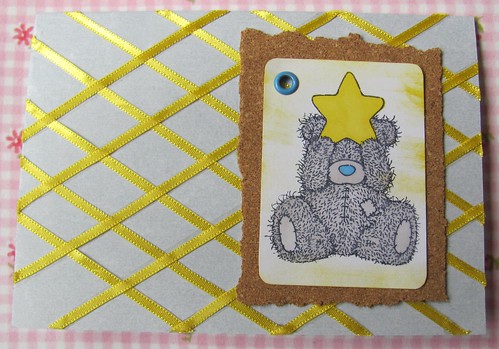
Are you a fan of these cute little bears? Over the years I've received quite a few as gifts but I'm most impressed with their images so when I came across a whole box of rubber stamps at the store I had to have some... I only bought 2 but its so tempting to buy the others... I won't though as you can only use them so much!

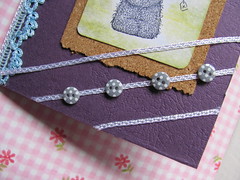
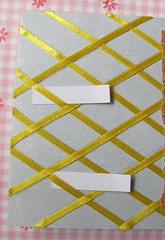
I had the image of a notice board in my mind so I bought some cork especially for it. The background  I used ribbon to create a fabric style notice board which I left some of it raised so that you can put some words of your choice on the front. Then I used the cork to make a cork board style notice board... as a pin I used an eyelet even though I have tonnes of brads.

For colouring in the image I used distress ink on the background and pro markers to colour in. I'm quite disappointed with my pro markers as they are too wet and even though I use a permanent based ink it smugdes so I'm going to keep an eye for a different ink incase its that.
Tatty Teddy 010
Tatty Teddy 007
Tatty Teddy 008
This time I tried to keep it simple but that space at the top is irritating me so it may end up slightly different, I'll see. This uses the same things as the one above but I've added in buttons and a brad.

If you'd like to own both these Greeting cards
or
you would like to cheer someone up
Please shout
Make My Day
in the comment section!

This is on its way to

Sunday, May 29, 2011

Make My Day..... Sunset and Dance Nights....

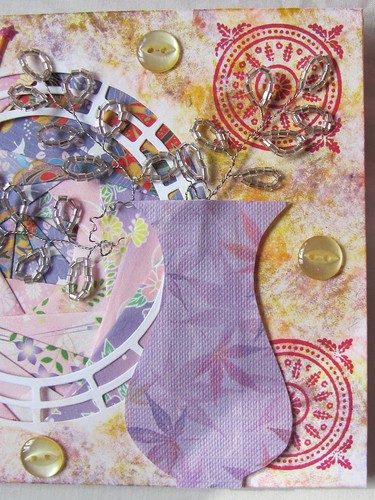
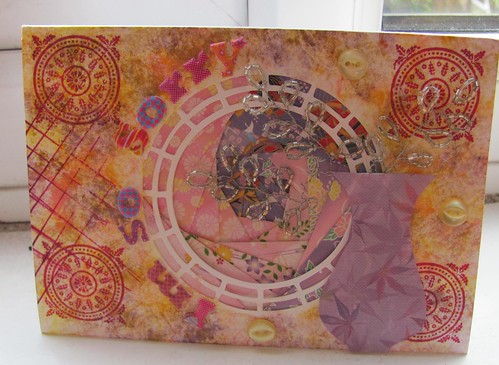
I've had this card sitting on my desk for about 2 weeks now waiting to be completed as I only managed to get as far as the iris folding which I was inspired to do as I was working on the previous cards.
Its all fun 001
The Iris folding is the part in the middle... which has ended up completely lost in the background I know.... I've no idea when this card got so fussy....
Its all fun 004
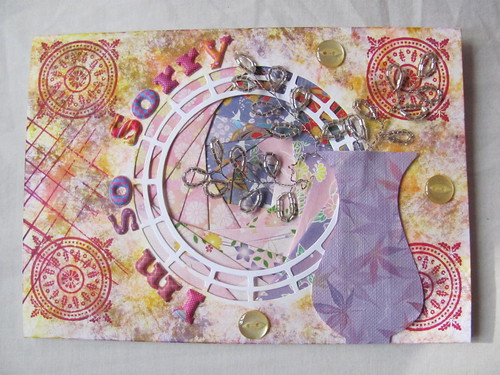
I love working with vases so added this vase and wire ribbon that I bought a long time ago...
Its all fun 002
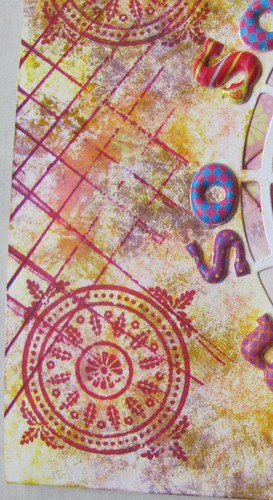
This side was looking a little empty compared to the rest so I added my lines....
Its all fun 005
I finished it with the words 'I'm so sorry' which was a request and added the buttons.... yes I know super fussy. I do have an idea for something to do with forgiveness but I just haven't had the time to get that idea into reality yet so hopefully I will do at some point this year.

This next card I've actually had on my desk longer then the one above, it just wasn't coming together so I left it until my brain would register what exactly to do with it so I hope you like it what I've done.
Its all fun 006
The image was too big for the card that came with it so I used plain white card, decorated it with backing paper, stuck on the dancer and cut around her.
Its all fun 007
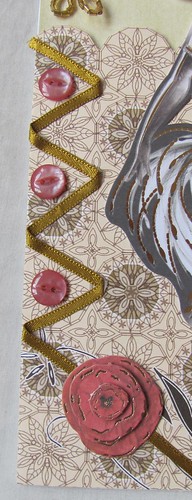
I then added the ribbon, poppy and buttons....
Its all fun 013
and used pealised paper and beaded ribbon wire on the inside. I only had this gold one left so ended up using the silver on the first one and the gold one on this even though gold did suit the first one.... oh well!

If you'd like to own both these Greeting cards
or
 you would like to cheer someone up
Please shout
Make My Day
in the comment section!

This is on its way to
Thursday, May 5, 2011

Make My Day...Long Time No See...

I've added a chatter box widget on the right hand side of my side bar for suggestions, to say how much you loved the item you received or general chatter...
took this opportunity to suggest a long time no see theme which had my brain whizzing around with ideas...
someone looking out of a window...
curtains...
vases...
funky wallpaper
a landscape scene...

First I needed the landscape scene, that turned out to be so disappointing as every magazine I picked up didn't have what I was looking for... if anything the images were rubbish and for the price of some magazines it really wasn't worth it... its a shame I couldn't go into the city where WHsmiths has a bigger variety of magazines... never mind though I choose the cheapest one that I could see myself using some images from. I couldn't print anything off the internet as my printer isn't a photo one so the quality is quite poor.

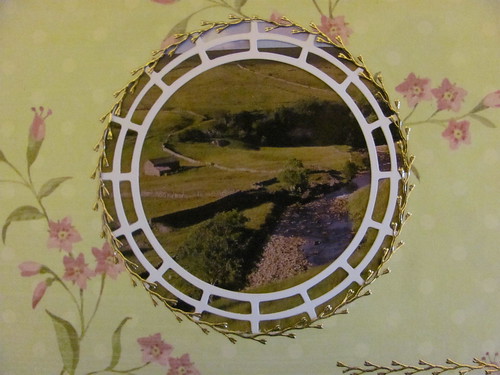
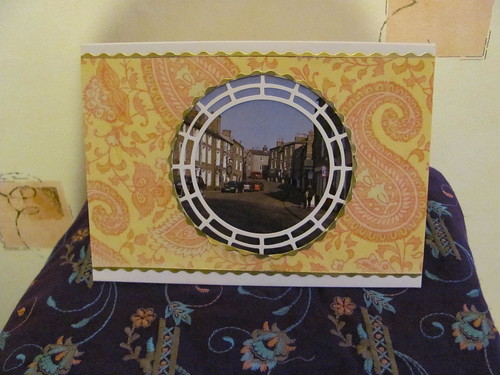
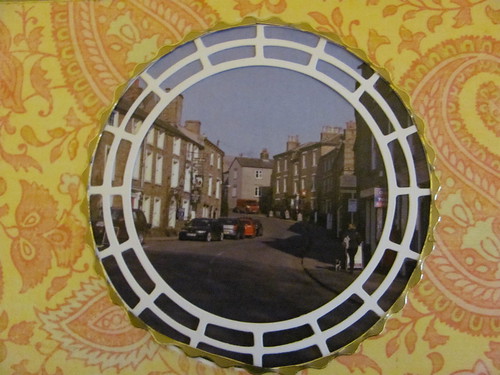
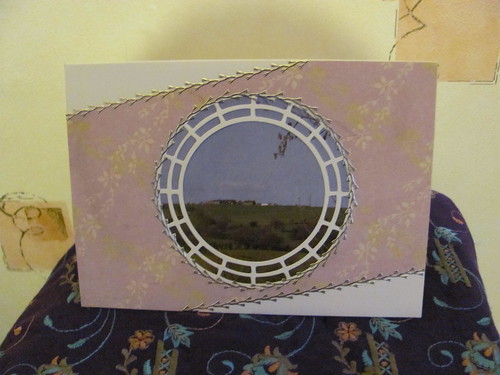
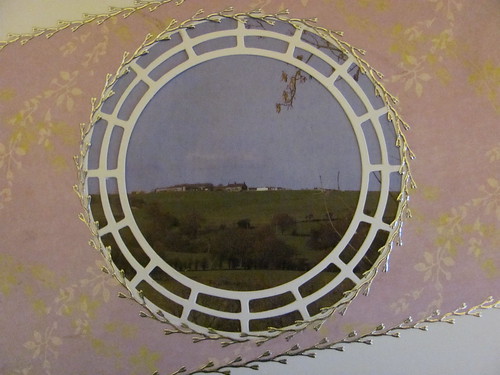
Then I made my way to the craft store and came across these lovely pre-cut greeting cards but they only had an arch way and this circular window but not the rectangle one that both had an image of... I love the idea of a circular window as its something different and un-usual and this is what I came up with....
Where are you?
Where are you?
I wanted to create the idea of looking out of a window, waiting for someone special, important etc... to come but in the end because these circles are so small I kept the background simple as not to take your eye away from the center.
Where are you?
Where are you?
So you get the window, landscape and funky wallpaper...
Where are you?
Where are you?
and finished with a peel off border.

I will recreate these maybe one day again but with a rectangular window and landscapes that are a little bit more what I'm looking for... I like all of these in there own way and it feels like someone is waiting for/looking for someone in different locations.

All of these pictures are of places in Yorkshire...

If you would like these Greeting Cards all you need to do is shout
Make My Day
in the comment Section
Good Luck!

If you have any suggestions why not share them too... and see what I come up with.

This is on its way to
Becca

Saturday, April 23, 2011

Make My Day....Air Mail Postcard...

Firstly Welcome to all the new followers and I want to apologise for there being nothing to claim when you came by from swap- bot but  finally here I am with another opportunity to have your day made or someone elses... This week the sun has been shinning, the birds have been singing and I can't help but think of birds of all kinds so I decided that this was such a fantastic opportunity to get my creative juices flowing.

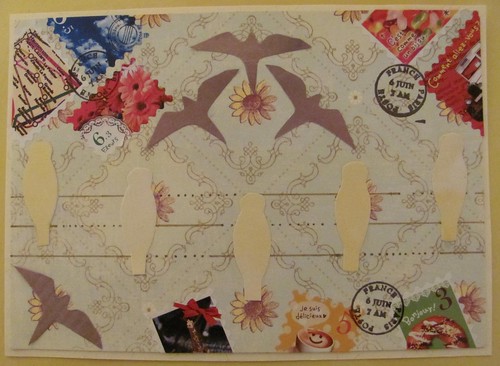
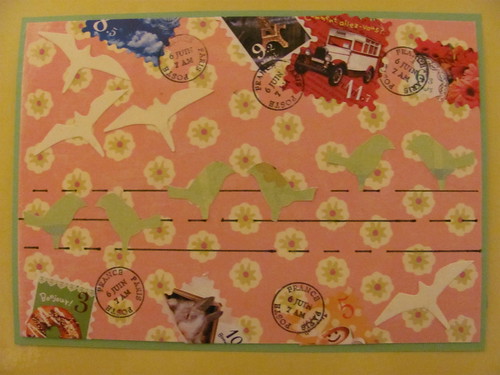
One of the bird images that I love is bird sitting on electricity cables, these are usually black silhouettes of birds but as black is a colour I don't have much of in my paper collection I decided to be bold and colourful as usual
Birds Birds Birds
I started by selecting my background paper, I then attempted to draw the birds myself but I just couldn't get the size of them right because they were either too small or two big. Thankfully my brain was working for once and I thought to use my rubberstamps of birds. I drew around the edge of the birds I wanted to use and stamped those on to paper and cut them out. I used black felt tip for the lines one this one...
Birds Birds Birds
and brown on this one... I choose the colour of the birds bassed on the colours I could see on the background paper. It needed a little something more so I used some postage stamp stickers around the edges. I finished it off with the postmark....

I did try decorating the backs of the postcards but it didn't look nice so I backed both the postcards on to coloured card which you can see a thin border around the edges of.

I had intended on making 4 of these but my sister turned up to go shopping so I only managed to make these 2 and decided I really need to post something as things have been too quiet here but life has been hectic with so much going on.

If you would like these postcards for yourself or a friend/family member
remember to shout
make my day
in the comment section so that I can tell the difference between who would like it
and who is leaving a comment

Here are some other things that I have made using these birds...
bookmarkfreedom
One last thing could you maybe help me with one of my next items for make my day in telling me some way of saying Sorry

This postcard is on its way to
Jo-anne

Tuesday, April 5, 2011

Make My Day...A Rubber Stampers Experiment...

A couple of weeks ago I went out and bought myself some Fimo to create with because a couple of years ago I received the most amazing Artistic Trading Card using it and a rubber stamp. Ever since I wanted to use Fimo in my crafts but never got around to it so when I saw a pack of 20 colours on sale in the craft store I couldn't resist buying it and giving it a try but I had to start small as its the first time I've used it.

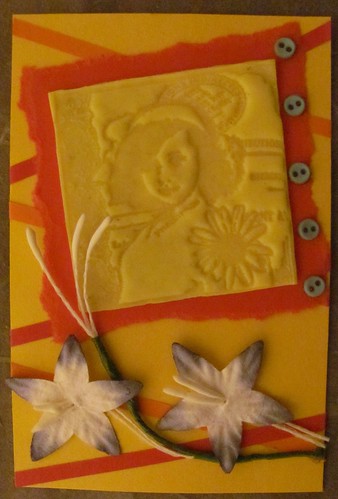
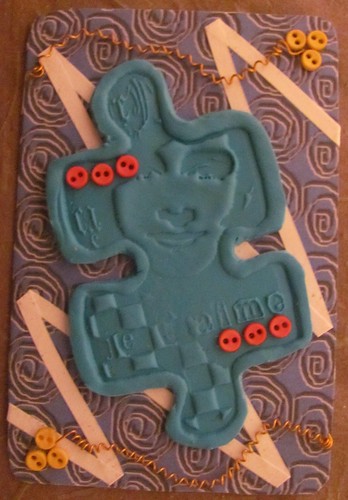
So keep in mind its the first time I've used Fimo so don't expect something perfectly made as the edges are quite rough and badly cut but I didn't realise just how bad until I cooked it. I started by rolling out my Fimo, stamping on top of it and removing the edges I didn't want. I cooked it for 30 minutes on the lowest heat possible.
Fimo ATCs
I've used yellow card, orange and red strips to create a slope effect in the background, red paper background paper for the Fimo image, green buttons and the flower.
Fimo ATCs
Patterned paper backed on to card, white strip of paper to create the folding zig-zags, buttons and gold wire which I twisted on to a needle to create a spring..

You will be seeing more Fimo on this blog and I hope that you'll enjoy it. Even though its an ATC I don't want one in return but feel free to pass it on in trade for another.

Here are other things that I have created using the flowers above
Little Treasure cardtoread having funvintage children

If you would like both these ATCs
All you need to do it shout
 'make my day'
in the comments section.

This is on its way to
Saturday, March 5, 2011

Make My Day...Travel the World with me Postcard....

I know I didn't post anything during the week but over the weekend I had really bad stomach cramps, I haven't had them for some time as I'm trying to change my eating habits so it was a little unbearable... then the first day back after the holidays we get a phone call at work from Ofstead so my week just went into going to work early and coming back later....
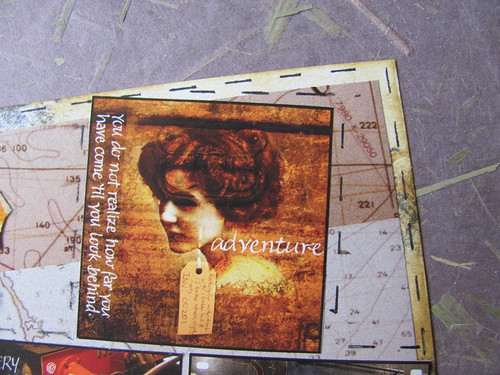
One thing I did do was read a book called The Pirates Daugter, I didn't sleep too great one of the nights this week so my mind ended up crafting so whilst I was laying there my mind just came up with this....
Travel Map Postcard 001
This looks a lot nicer for real.
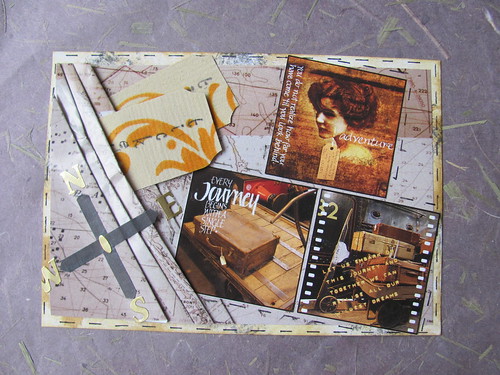
My mind actually thought about a A-Z style maps but I'm not cutting up my A-Z as I still use it! So I knew that I already had this map that came in a collection of papers a friend sent me a long time ago.
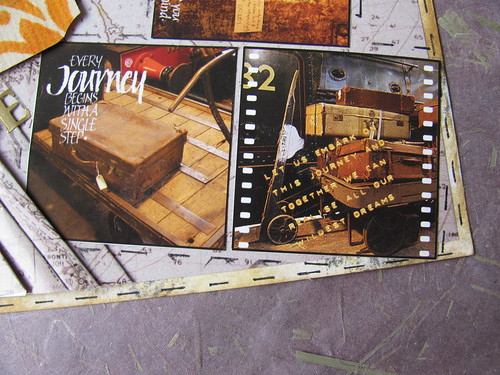
Travel Map Postcard 004
I used distress ink around the edges to give it a sandy look since you end up somewhere near a sandy beach when you come off a boat.
Travel Map Postcard 005
By the way I did imagine using these images (well not these exact ones but from the booklet I own with them in). My thoughts were actually of hand stitching around the edges but I didn't feel up to it so used a ruler and pen to create the lines which smugded creating a little more of an oldish/worn out look.
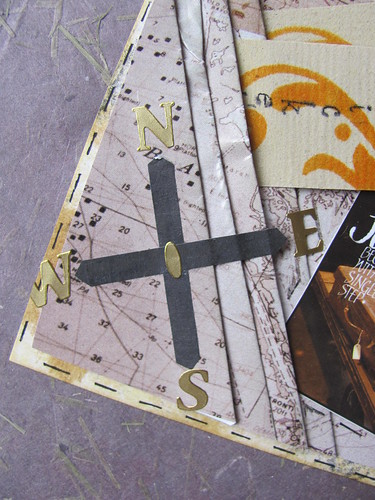
Travel Map Postcard 002
I then imagined that I'd have a compass right in the middle on the side... only I added the compass but at the bottom instead... because
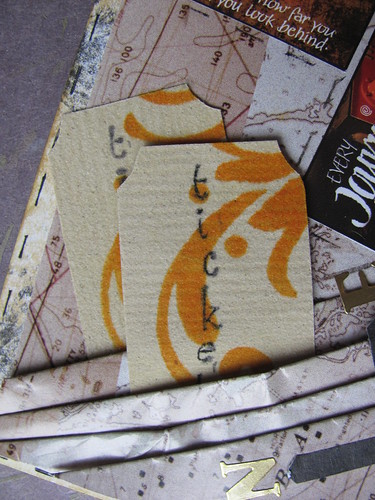
Travel Map Postcard 003
I wanted to add these tickets which I made using sand paper to get a little old rough edge feel to it. I had imagined folding the map as I have done which I used to do a lot in my days of making neat FBs but for some reason never used again. I realised it would make great pockets which is why I've added the tickets as I have. Originally the world ticket would have just been there on its own but it looked like something was missing so I used my brand new inks to stamp this floral border. I never imagined the yellow would be so strong as usually they are so light and annoying... which has left me over the moon as I'll be able to use it a lot more often.

So this is what I spent about an hour of my morning doing and now I hope you now like this enough to shout 'make my day'.

I choose to make the day
of somebody in Germany
Related Posts Plugin for WordPress, Blogger...